Flexibility in managing user access policies in Salesforce allows support managers to save time spent manually activating and deactivating user permissions. Starting with a definition of the access needed and a definition of the users who now (or no longer) need the access, you can grant (or revoke) permissions selectively all at once, or automatically.
By setting criteria, you can define a general persona (e.g. service agents) or group of users (e.g. super users that get early access to new features) to manage permissions all at once. You can identify target users by their function, such as Profile or Role; You can be more selective by targeting Groups, Queues, or Permission Set/Group membership. Additionally, you can go straight to the User fields; some are more useful (Active, Title, Department, User Type) than others (Nickname, Survey Sender).
With this set, you can grant or revoke access with the User access policy, including:
- Permission Sets
- Permission Set Groups
- Permission Set Licenses
- Package Licenses
- Groups
- Queues
Previously you would have to grant permission to each point of access one by one for each user, or with an ETL operation. With user access policies, you can set the access, choose the users, and be done: less tedium and less room for human error!
Examples
Let’s start with a simple but powerful example where we will manage access for service agents onboarding, getting promoted, and moving on.
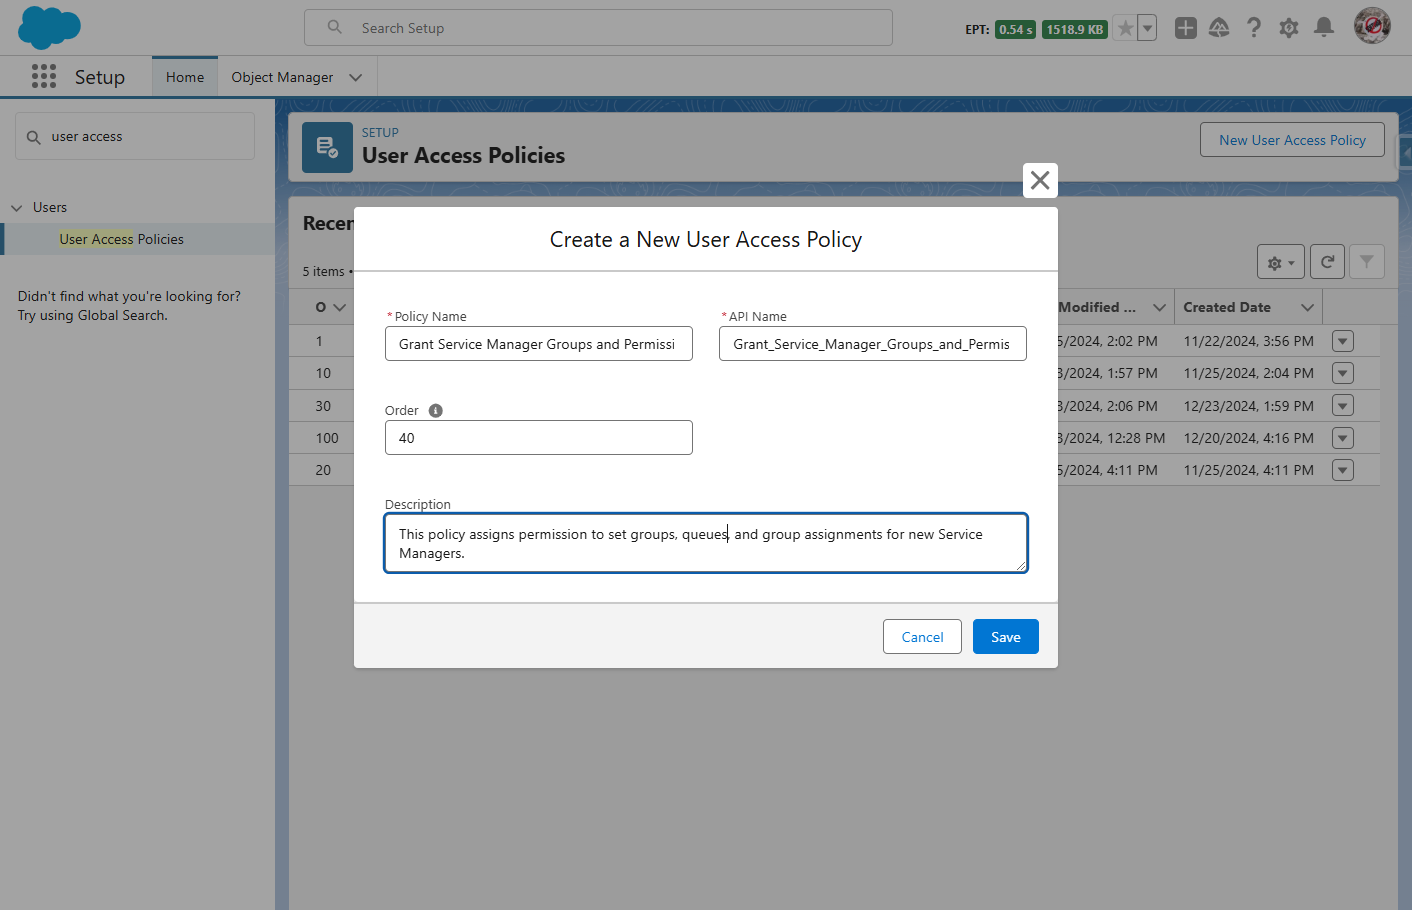
To start, from Setup > User Access Policies, click New User Access Policy. Name the access you are going to configure and what you’re going to do with it (e.g. “Set Up New Service Agent” or “Offboard Support Manager”), then set the order number. Note that as you add User Access Policies, you’ll use this to control the order or evaluation and processing. Consider starting with multiples of 10 for some wiggle room in the future.
Example 1: Onboarding New Agents
We can onboard new members to the Service Team and grant them the licenses and permission sets for tools and functionality they need for their role.
First, select the role assigned to new Service Team members to define the Users. Then in the Define Actions, set it to Grant the Permission Set/Groups, Package Licenses, etc. Click Save.

Now Users in the Service Team member role can get the corresponding access needed to fulfill their duties. All in one fell swoop!
Example 2: Team Role Changes
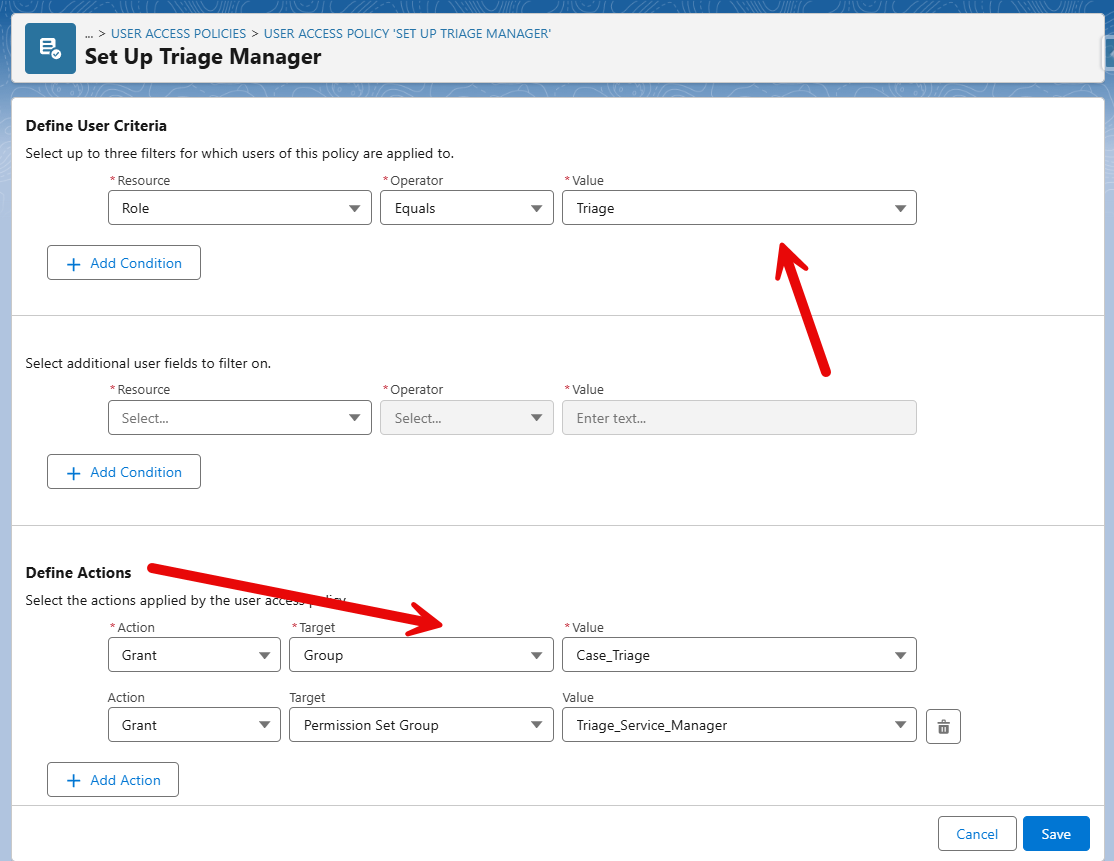
Your Service Agents have grown in responsibility, or earned promotions to new roles; you can add or change their access based on criteria you define. For example, let’s say you have a Service Member moving from a direct-to-customer support Group to a managerial/triage Group.
To start, define your target Users in the first step; in this scenario, the Triage Managers all come from the Triage Role. Then skip down to the actions and select the permission sets or permission set groups, package licenses, etc. this group should have with the action “Grant.” Hit Save.
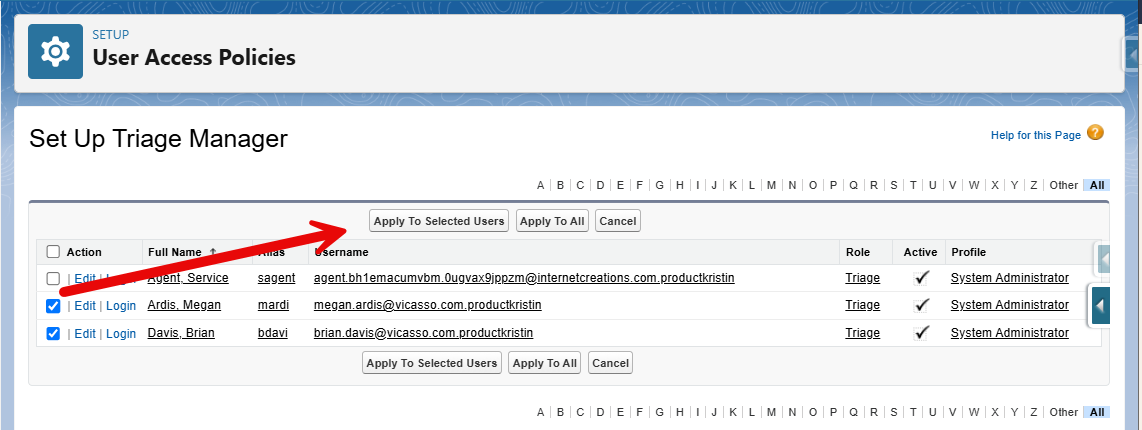
Then click Manually Assign Policy to see the users from the group – the ones we said were eligible for this User Access Policy. Select the new user(s) to the group and click Apply to Selected Users.

Previously, you had to wade through a list of Users in the Manage Users section of a Permission Set and then repeat the process to assign licenses. Going forward, you can modify this policy to give the whole group new permissions or package licenses simultaneously.
Example 3: Deactivating Users
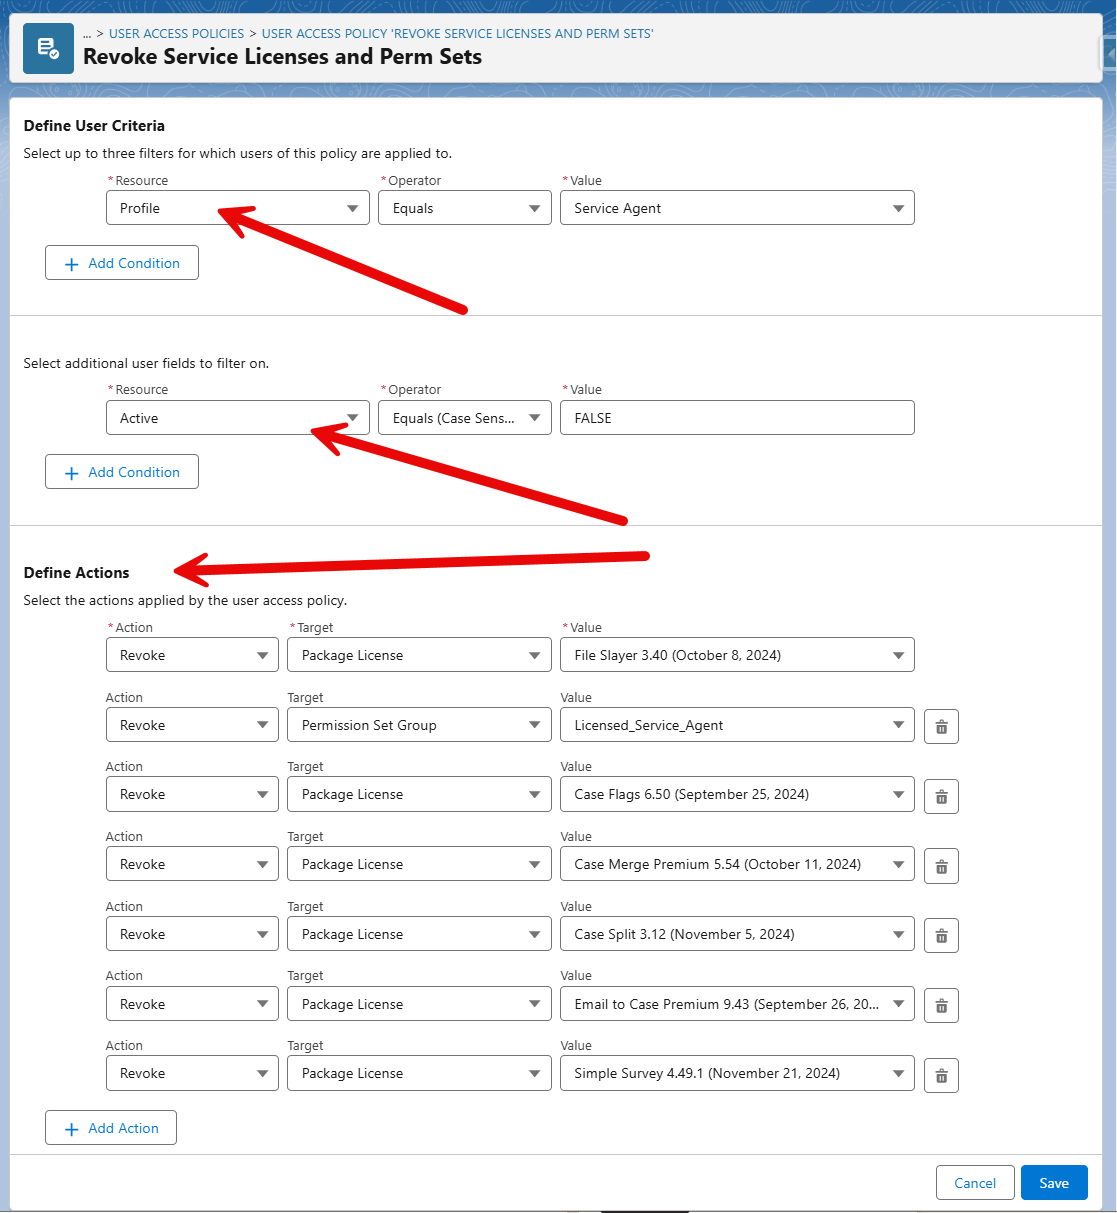
Finally, when you need to deactivate a User, you can remove their paid licenses without a second thought! First, define the user with the permissions to remove – this could be by Profile, Group, or Package License to remove.
Next, create a secondary filter for Active = FALSE. Then, add the Package Licenses to remove with the action “Revoke.” Hit Save.
Products from the AppExchange can enhance user experience as well as user productivity, but not when they’re assigned to inactive users. No one wants to pay for something that isn’t being used, so safeguard your AppExchange budget with a simple User Access Policy.
As the last step, automate your policies.
The criteria we previously set will be the triggering (or “entry”) criteria to fire the automation (except example 2). You can set the policy automation to run on create and/or update. Since we’re likely revoking access after they’ve been active, you’d set this to run on updates.

If these licensed packages came with corresponding Permission Sets, include them in a Permission Set Group, then assign and revoke them with User Access Policies too!
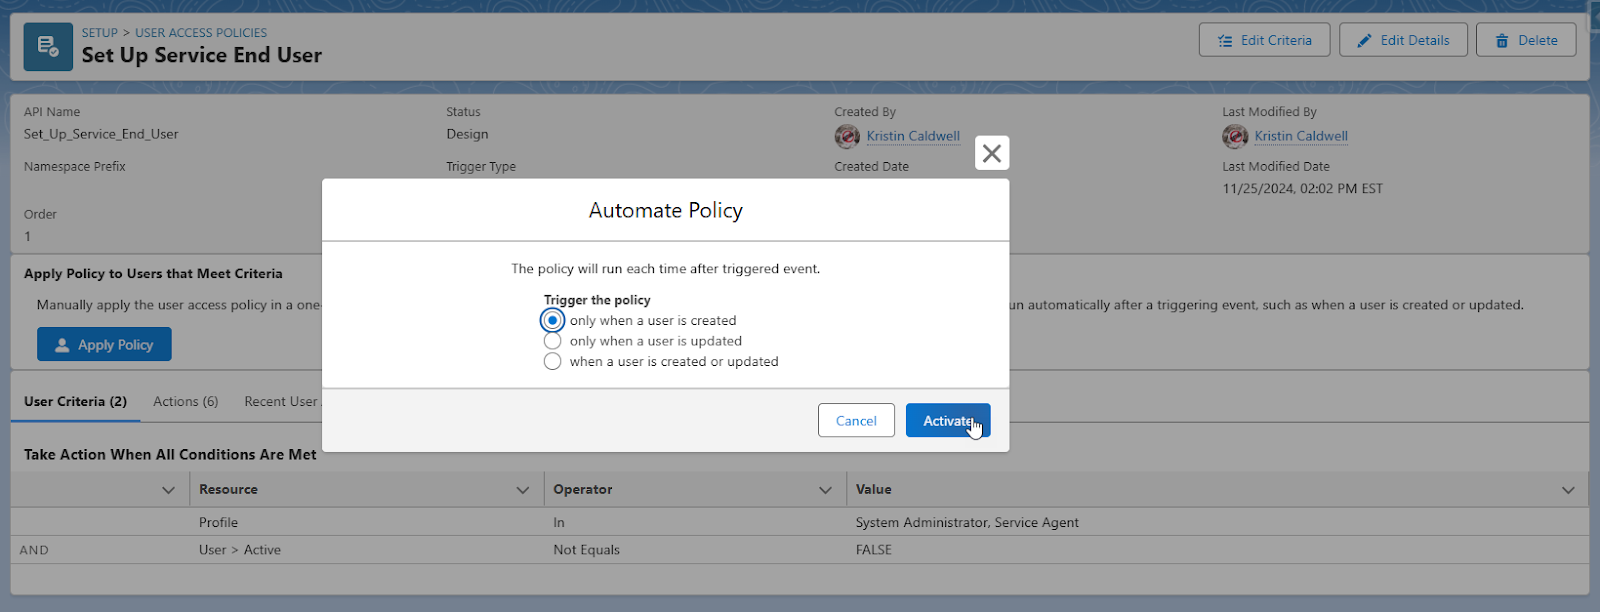
Similarly, when we’re setting up new users (as we did in example 1), we can set the User Access Policy to run when the User is created:
Resources:

